Quick answer: Most epoxy and PU floor failures start with poor surface preparation, not with the coating itself. The concrete must be sound (pull-off strength at least 1.5 N/mm²), dry (moisture not above 4 CM% for epoxy), clean, and mechanically opened by diamond grinding or shot blasting before priming. Acid etching and simple sweeping are not enough for an industrial floor.
Last updated: November 2026 · By Ducon Polymer Flooring (DPF)
When an epoxy floor peels, bubbles or cracks within months, the cause is usually underneath it: laitance, oil, moisture or weak concrete that the coating could not bond to. This guide explains, step by step, how DPF prepares concrete before installing Dupoxy SL self-leveling epoxy and Ducrete MF PU concrete – and what to check when comparing quotations.
Why Surface Preparation Matters
- Bond: a resin floor is only as strong as the top few millimetres of concrete it is stuck to. Weak laitance or dust breaks away, taking the coating with it.
- Moisture: water vapour rising through a damp slab pushes the coating off from below, causing blisters.
- Contamination: oil, grease, curing compounds and old paint stop the primer from soaking in.
- Cracks and joints: untreated cracks reflect through the new floor.
Step 1: Inspect and Test the Slab
Before any work, the slab is checked for:
- Strength: the surface pull-off strength should be at least 1.5 N/mm². For PU concrete, the base should be at least C25/30 concrete or a strong cement screed at least 25 mm thick (not lightweight concrete).
- Age: new concrete should cure for at least 28 days before coating.
- Moisture: for epoxy, substrate moisture should not exceed 4 CM%. Damp areas must be dried or treated first.
- Contamination: oil-soaked zones around machines, old coatings and curing compounds are mapped for removal.
- Cracks, joints and levels: movement joints, cracks, holes and low spots are marked for repair.
Step 2: Mechanical Preparation
The surface is opened up mechanically to remove laitance and give the primer a rough profile to grip:
- Shot blasting: fast and dust-free on large open floors; leaves an ideal profile for self-leveling systems.
- Diamond grinding: used near walls, on smaller areas, and to remove old coatings and heavy contamination.
- Scarifying: for thick contamination or uneven old floors.
Acid etching is not recommended for industrial floors because it leaves residues and does not remove weak concrete reliably.
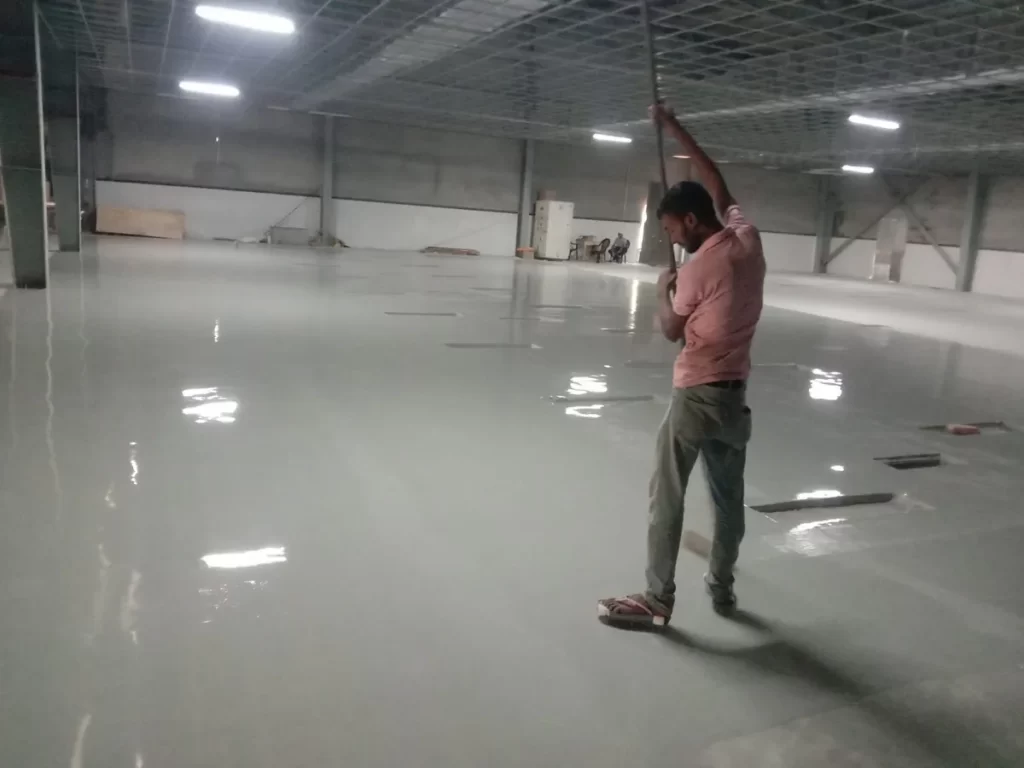
Dupoxy SL being applied on a mechanically prepared and primed floor.
Step 3: Repairs and Detailing
- Holes, cracks and broken joints are filled with an epoxy repair mortar.
- For PU concrete, anchor grooves (at least 3 mm wide and 5 mm deep) are cut just inside the perimeter and around drains, columns and door thresholds so the edges cannot lift.
- Falls to drains are corrected in wet areas so water does not stand on the finished floor.
- All dust is removed by industrial vacuum – not by sweeping.
Step 4: Priming
Priming seals the concrete and creates the bond layer. For Dupoxy SL we use an epoxy primer such as DUPRIME 200, rolled into the surface, with a light broadcast of 0.2–0.5 mm quartz sand (about 600 g/m²) while it is wet. Porous slabs may need a second coat. The self-leveling layer must then be applied within 24 hours of priming.
Step 5: Check Site Conditions Before Application
- Air and floor temperature within the system’s range (about 10–35°C for Dupoxy SL and 10–30°C for Ducrete MF).
- Floor temperature at least 3°C above the dew point to prevent condensation – especially important in humid monsoon weather and coastal areas.
- Materials stored close to site temperature, out of direct sunlight.
Common Shortcuts to Watch For in Quotations
- “Sweeping and washing only” instead of grinding or shot blasting
- No moisture test on ground-floor or new slabs
- Coating over old, flaking paint
- No crack or joint repair included
- Very low thickness to reduce the price
A cheaper quote that skips these steps usually costs more within a year. See our 10-point checklist for choosing an epoxy flooring company and the common epoxy floor problems that poor preparation causes.
Frequently Asked Questions
Can epoxy be applied directly on new concrete?
Only after the concrete has cured for at least 28 days, has been mechanically prepared to remove laitance, and its moisture is within limits.
Is grinding enough, or do I need shot blasting?
Both give a suitable profile. Shot blasting is faster on large open areas; grinding is better near walls, on small areas and for removing old coatings. Many projects use both.
Can you coat over an old epoxy floor?
Sometimes. If the old coating is well bonded, it can be ground and recoated. Loose or peeling coatings must be removed completely first.
Does surface preparation add much to the cost?
It is included in a proper supply-and-apply price. See our epoxy flooring price guide and PU flooring price guide.
Get a Free Site Inspection
Our team will test your slab and recommend the right preparation and floor system. Call 01711-037659, email info@duconasia.com or use the contact form.